Hanji Crew

Hanji Crew
About the Crew

Monday, March 21, 2011

Making hanji paste

Hanji paste is simple... just flour and water.


Whisk 1 part flour into 6 parts cold water in a saucepan.


Over medium-high heat, bring to a boil, whisking constantly. It thickens quickly once it reaches a boil.


Pour into a container, and keep covered in the refrigerator. That's it!


Construct-a-box class projects


The boxes from the construct-a-box class were spectacular! Each started with a strip and a square of tagboard... outstanding results.


Monday, March 7, 2011

March 13 box class

We've got a really special class scheduled on Sunday. We'll be constructing 8-sided boxes from a mat board -- a super hanji project for a beginner or an experienced hanji crafter... one of my favorite projects because it doesn't require a pre-cut form from Korea. Here's the finished product:


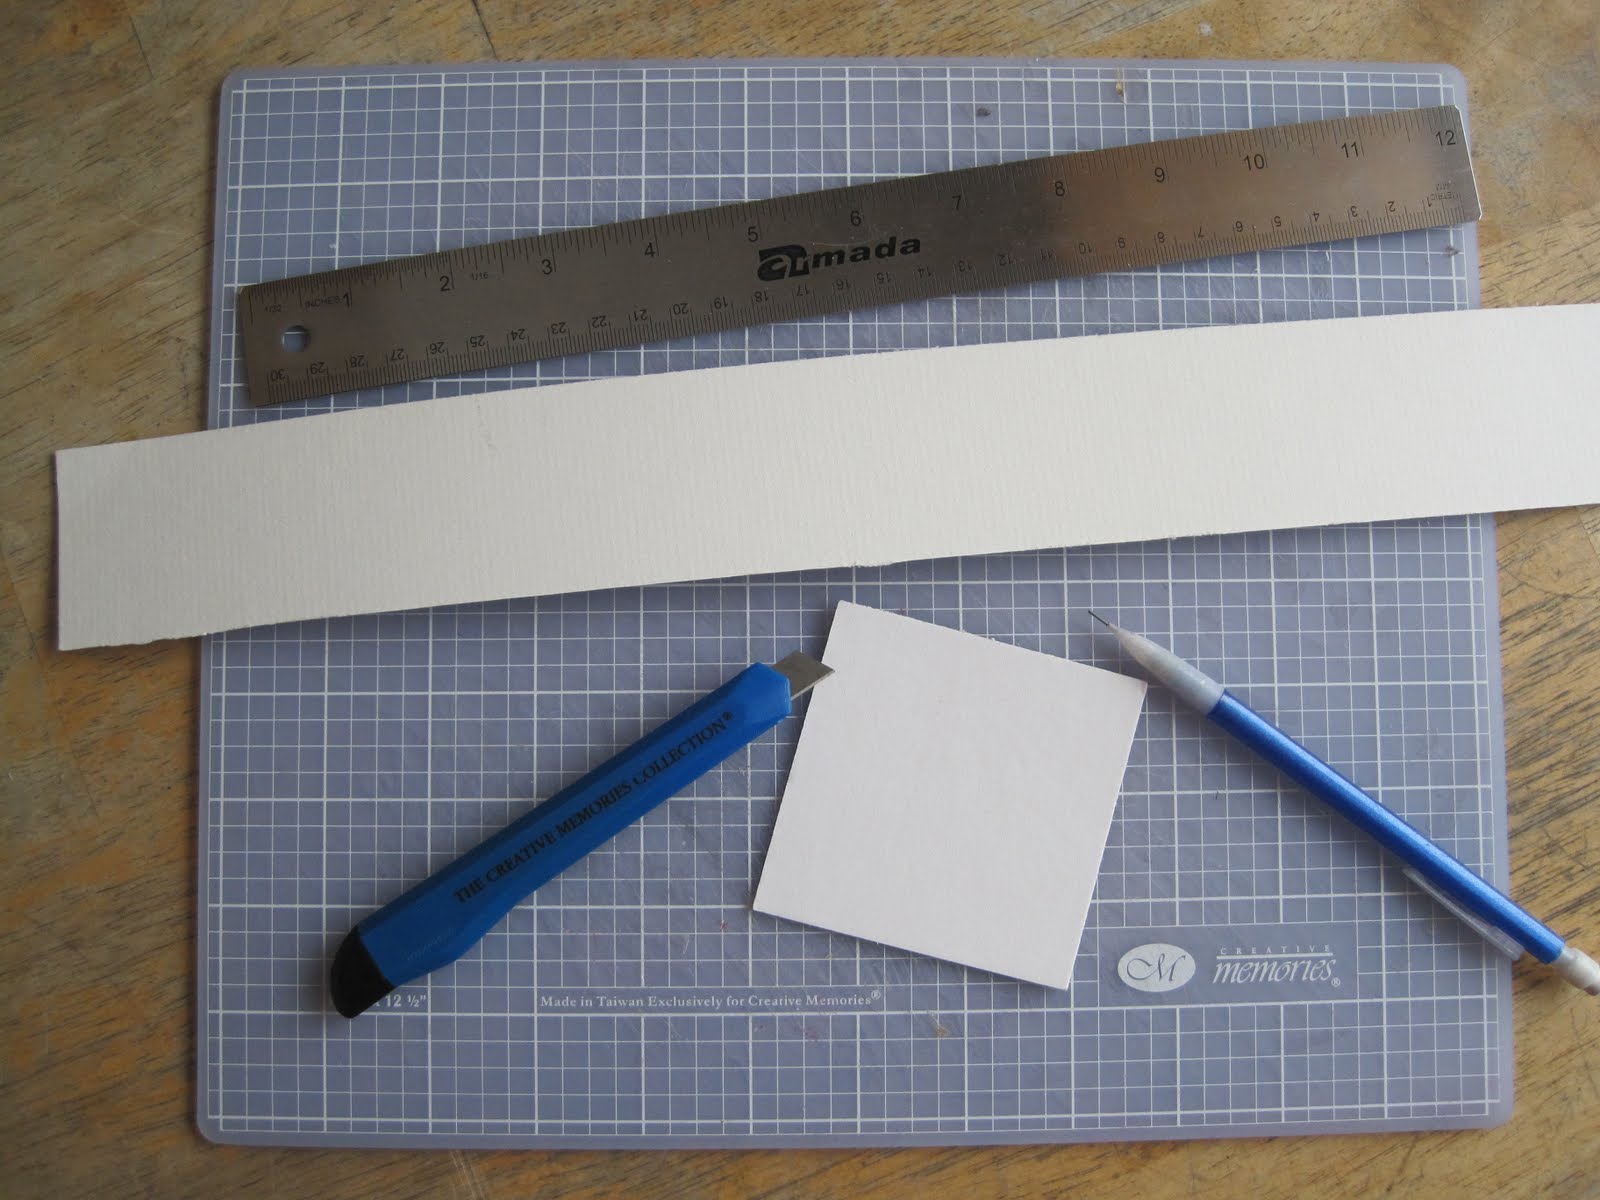
Here's how...Start with a strip and a square of mat board.


Score the strip of mat board into 8 triangles.


Fold it around the square piece of mat board and tape it.


Cut 8 triangles of white hanji paper slightly larger than the box triangles.


Cover the box with the white hanji paper using flour-water paste.


Let it dry. The hanji paper is very fiberous and strong, even when it's wet. When the paper dries, it will be a sturdy box.


Cut colorful paper and layer over the white paper. Adhere using flour-water paste.


Continue adding colorful hanji paper.


Cut thin strips of hanji paper to edge the box.


Add a cut design. Lovely!


Wednesday, February 9, 2011

Adding color to a cut design

Adding color layers to a cut design takes a little practice and a steady hand, but it's so worth it!

After I cut the design, I used the same pattern to cut colored pieces to add to the design, like a stained glass window.


I started with the yellow center -- the color that will be at the front of the design. The outline design is face down, color added to the back of the design. I use just a drop of flour-water hanji paste to attach it -- carefully.


The next layer is red, layered from the back over the yellow piece of mulberry paper.


Then I added the background color on top of the red layer. I added a small amout of hanji paste to tack down the colored paper layer.


Turn it over and you've got a colorful design! I added a layer of hanji paste to the box and attached the design, then pasted over the front of the design to anchor it all.


Saturday, February 5, 2011

Add this to my calendar


My daughter Mary sent me this posting with a note saying that Kat and I should find a way to attend the next version of the event. I agree.

Tuesday, January 11, 2011

Winter - Spring 2011 Hanji Class Projects

Welcome to a new season of hanji classes at Korean Heritage House, 681 North Snelling, St. Paul, MN. Send an email to thehanjicrew@yahoo.com to register. Questions? Call Libby at 612.875.1725. As always, proceeds support Korean cultural organizations.


Valentine Boxes
Sunday, January 30, 1:00 - 4:00
Add a cut design and hearts to a small box. Great project for kids!

$5/box


Paper Cutting Workshop
Sunday, February 27, 1:00 - 4:00
Cut traditional Korean designs from mulberry paper. If you've taken the paper cutting class before, we'll have more advanced designs on hand to try.
$10


8-Sided Box Construction
Sunday, March 13, 10:00 - 4:00
In an extended class, construct a box, then cover it with mulberry paper and add designs.
$10


Glass Pendants
Sunday, April 10, 1:00 - 4:00
Our most popular class is back! Create pendants with designs we cut for you, or just use the colorful paper to make one-of-a-kind pendants for jewelry, key rings and more. Kids OK with a parent.
$10/pendant


NEW! Night lights
Sunday, May 1, 1:00 - 4:00
Cut a design, or use one we've cut to create a fabulous night light!
$15/light

Monday, January 3, 2011

Boxes from Korean forms

In Seoul, the hanji stores in Insadong are stacked high with cardboard forms that you shape into boxes -- every size and shape imaginable, along with trays, drawers, small tables, lanterns and more. I haven't built any of these lately, so I spent a little time over the holidays to create some boxes.

I use these sparingly, as it's not easy to replenish my supply. The forms start out flat, so if I can talk someone into bringing some back from Korea for me, at least they are easy to carry!


The forms are scored, so it's easy to bend them into the necessary shape, then glue. Once I got the box shaped and glued, I added hanji paper inside.


Argh! Sleepy cat on the paper I need!


When I finished the inside (and let the box dry), I cut the paper for the outside. The paste is a traditional flour-water mixture.


The box bottom is done and dry; on to the top of the box. The edges are rough; I'll cover those with long, thin strips of hanji paper at the end of the process.


The top and bottom are papered inside and out, and the trim added (in this case, a dark brown paper cut in 1/4-inch wide strips). The final step is the most fun: adding the cut designs. This one is all turtles, the top one sporting a good fortune symbol, perfect for a new year gift.


I made these four boxes this weekend. Gotta love it.
Back to work tomorrow. It was fun while it lasted!

Happy New Year!